As a UVM campus visitor or external collaborator, the method of authentication and the type of access you receive with your UVM Guest Account varies by how your account was sponsored.
- Self-sponsored accounts – Requires the use of SMS test messages to complete the self-sponsorship process. These accounts remain active for 24 hours, and only includes access to the UVM Guest wireless network. Self-sponsored accounts may receive lower bandwidth and limit the use of some protocols.
- Sponsored accounts – Requires that a current UVM affiliate creates the account. Access can be provisioned for up to one month. These credentials can be used to connect up to 5 devices to the UVM Guest WiFi network.
Connecting to UVM Guest wireless
Self-sponsored UVM Guest account (for visitors)
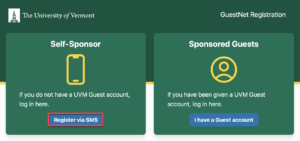
- Connect your device to the UVM Guest network. When you do, a UVM Guest captive portal window should appear.
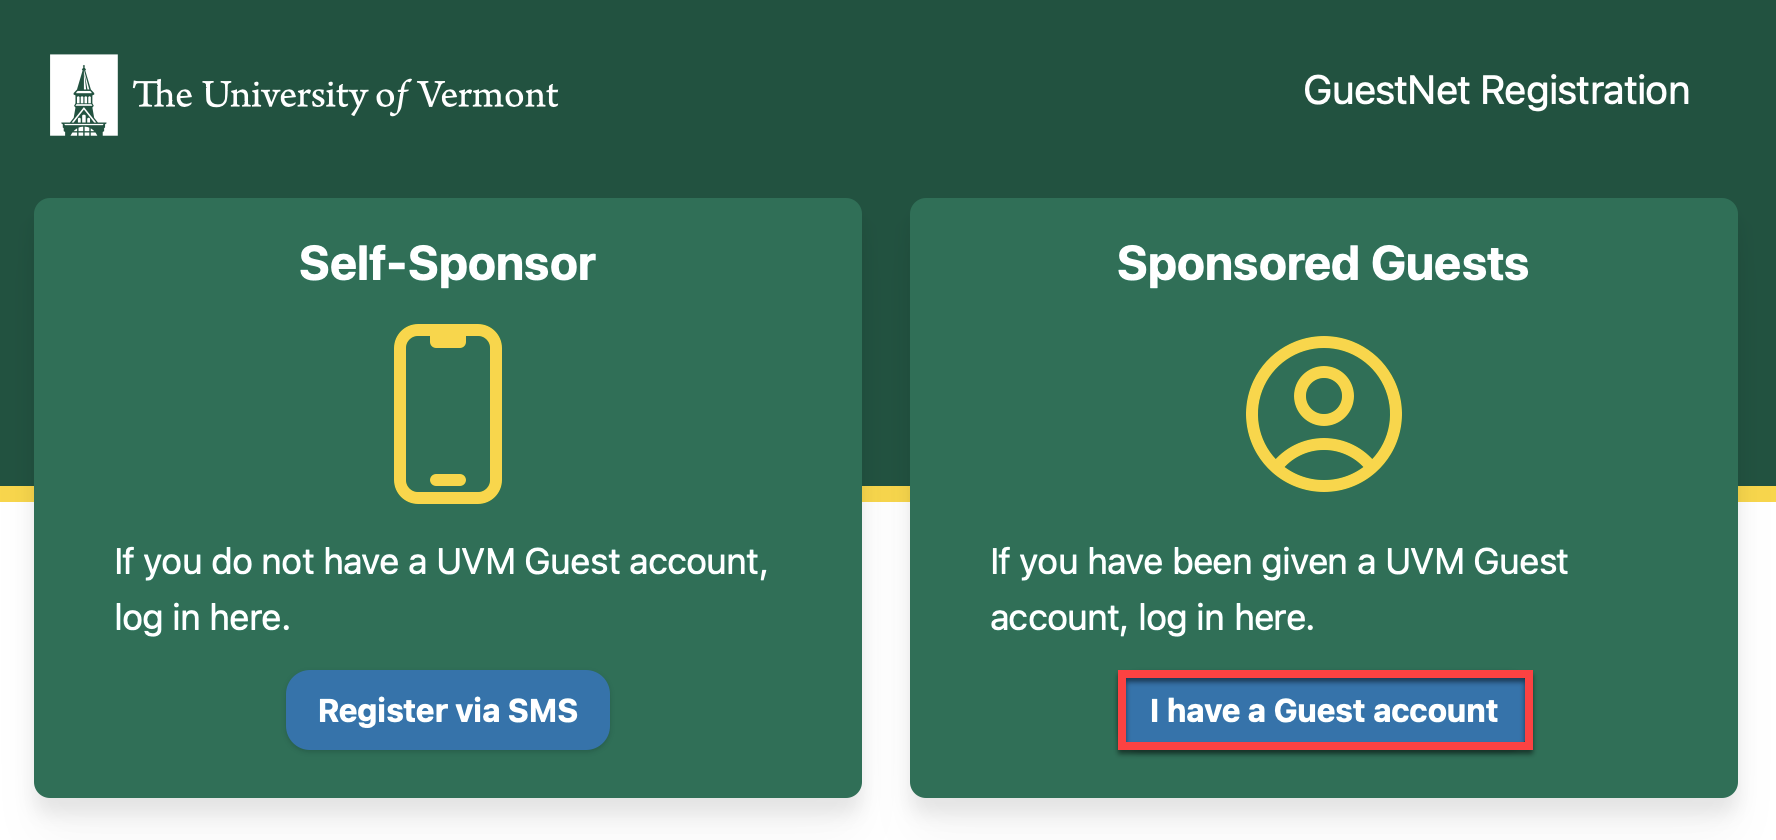
- Under Self-Sponsor, click Register via SMS.
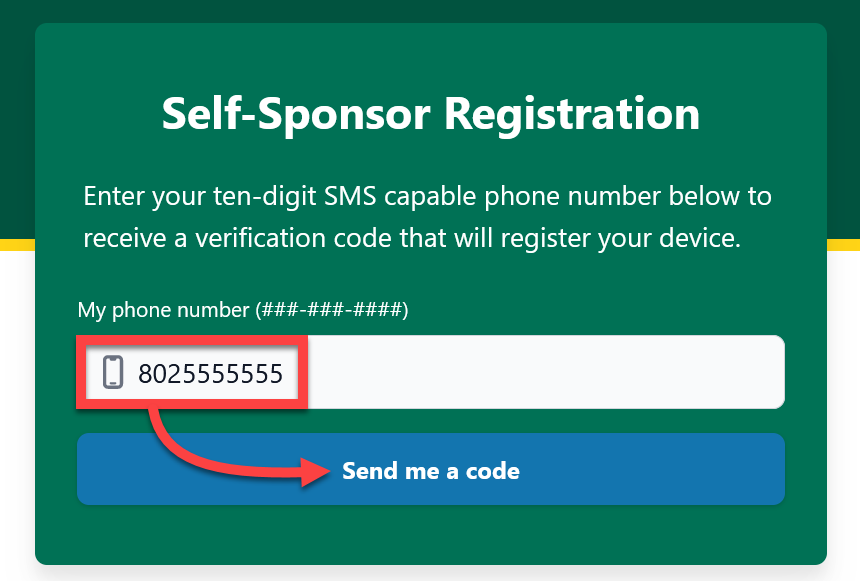
- Enter your 10 digit phone number, and then click Send me a code.

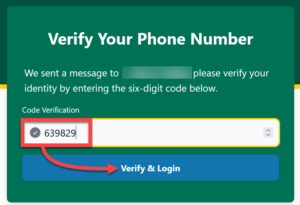
- Your mobile phone should receive an SMS text message containing a six-digit confirmation code.
- Enter the code, and then click Verify & Login.
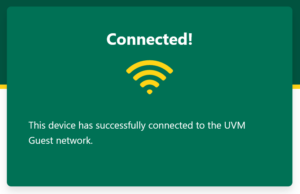
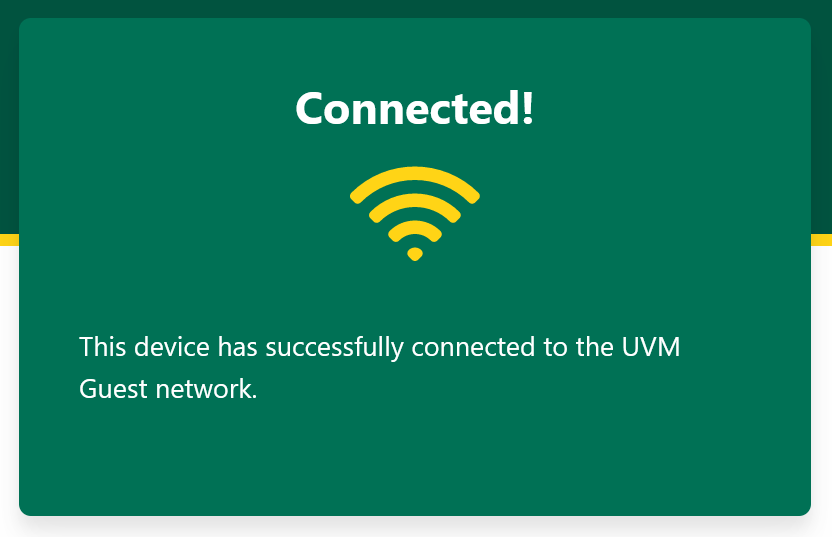
- You should now be connected to the UVM Guest network!


Sponsored UVM Guest accounts
- Connect your device to the UVM Guest network. When you do, a UVM Guest captive portal window should appear.
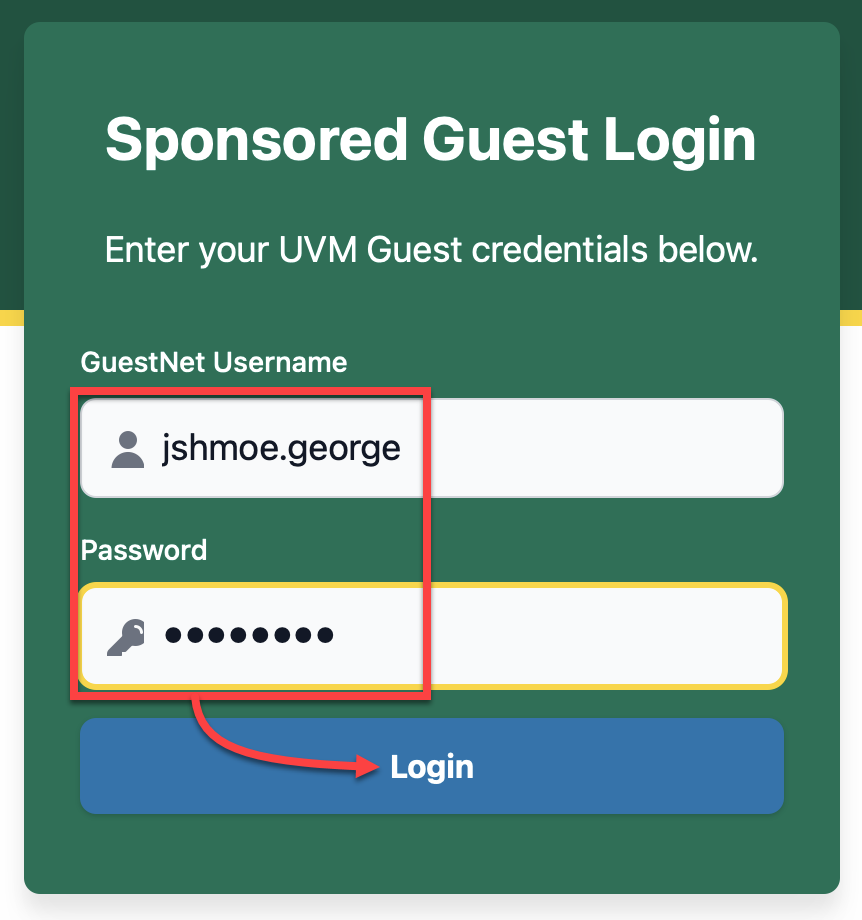
- Under Sponsored Guests, click Login.

- Log in using your sponsored GuestNet username and password.
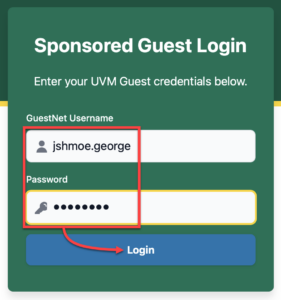
- You should now be connected to the UVM Guest network!
Sponsoring a UVM Guest Account
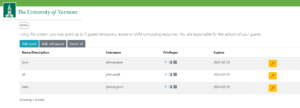
The following guides are for current UVM Students, Faculty, Staff, and Departments. Sponsored guests can be granted access to the UVM Guest WiFi network, lab computers, and/or SharePoint for up to one month at a time.
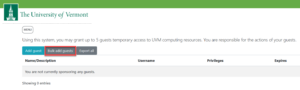
Provision a UVM Guest account
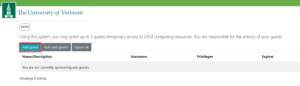
- Visit go.uvm.edu/uvmguest in a web browser. If prompted, log in with your NetID and password.
- Click the Add Guest button.
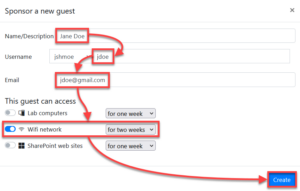
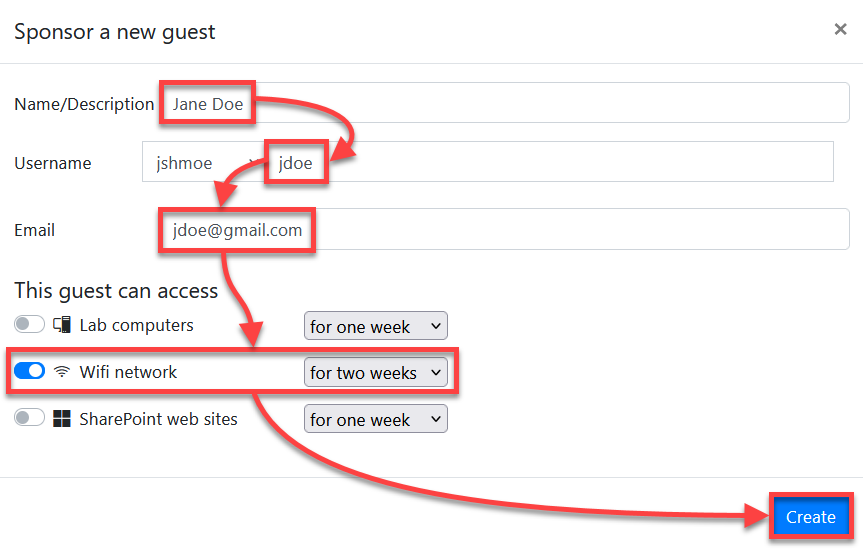
- Fill out the form with your guest’s information. Click the relevant access toggle(s) and specify the length of time that access should be granted, and then click Create.
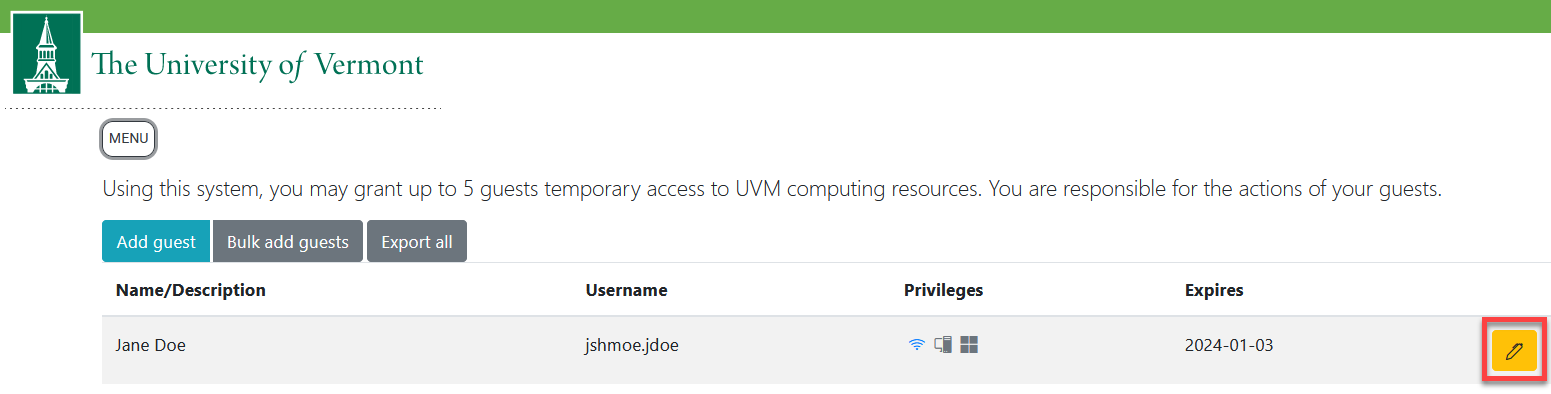
- Your guest should receive an email with their UVM Guest credentials. They can use these credentials to connect to the UVM Guest wireless network. You can access details of a sponsored guest, or change their password, by clicking the Pen icon to the right of their account on the main guestnet-admin (go.uvm.edu/uvmguest) page.


Batch request Guest accounts
If your department requires a large number of guest accounts to be provisioned, please contact our Identity and Account Management team no later than 3 business days prior to the date the accounts will be used.
Email: iam@uvm.edu
Phone: 802-656-2006
Bulk add Guest accounts from a file
- Visit go.uvm.edu/uvmguest in a web browser. If prompted, log in with your NetID and password.
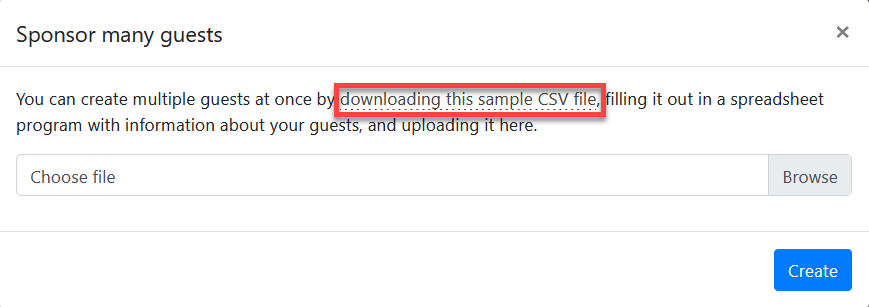
- Click the Bulk add guests button.
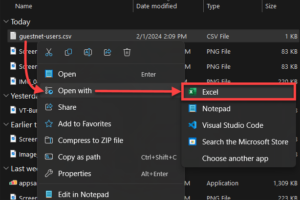
- Click downloading this sample CSV file to download a template.

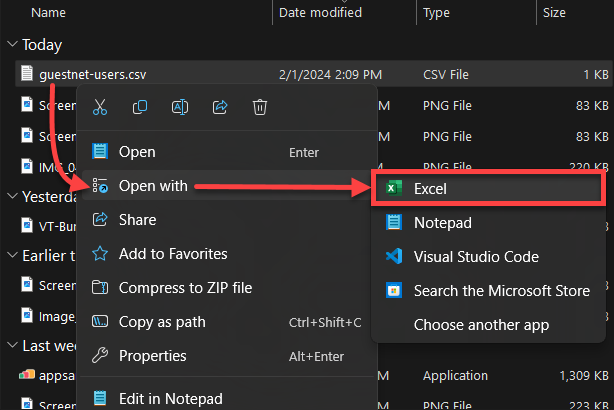
- Navigate to your Downloads folder and locate the sample file (guestnet-users.csv). Then, right-click the file and select Open With Excel.
- Enter a name or description for each user, a username in the format (your NetID).(their name), and the email address that they use. For each service that they need access to, enter a start date and an end date. When you’re finished, save this as a .csv file.

- In the Sponsor many guests window in your browser, click Browse and find the .csv you just saved. After selecting it, click Create.

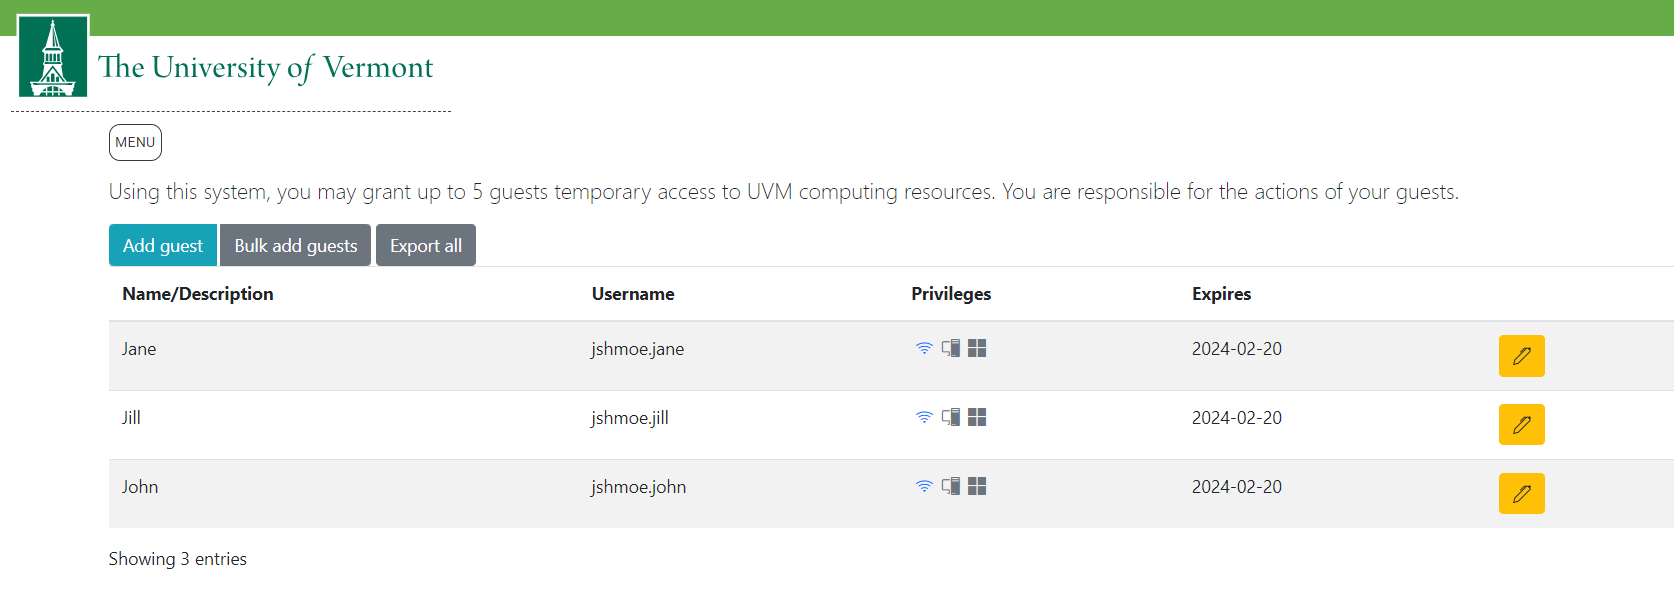
- You should now see a list of the guests you added. They will each get an email to the address you entered with their guest account’s credentials. You can access details of a sponsored guest, or change their password, by clicking the Pen icon to the right of their account on the main guestnet-admin (go.uvm.edu/uvmguest) page.