
The following guides will help you connect to UVM’s wireless network. The guide includes steps for Windows, macOS, iOS and Android. If you have connected on your device previously, you may first need to forget the network.
Computers
Windows
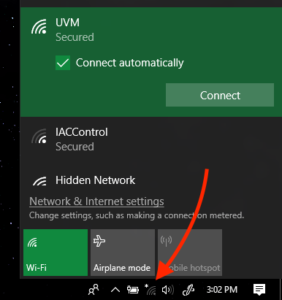
- Click on the WiFi icon from your icon tray (normally, in the bottom right corner of your screen). Select UVM from the list of available networks, then ensure the Connect Automatically option is checked, and click Connect.
- Enter your UVM NetID and password, then click OK.

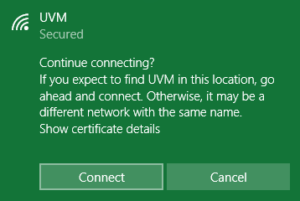
- Click Connect again when the following prompt is displayed:
- You should now see the filled wireless icon, indicating a successful connection to the wireless network.


macOS 13 Ventura and Newer
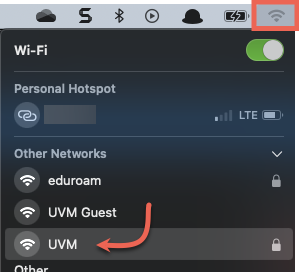
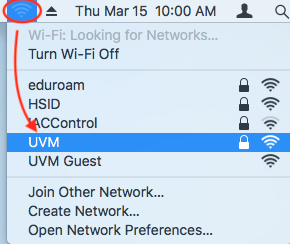
- Click on the Wi-Fi icon in the top right corner and select the UVM network from the list of Other Networks
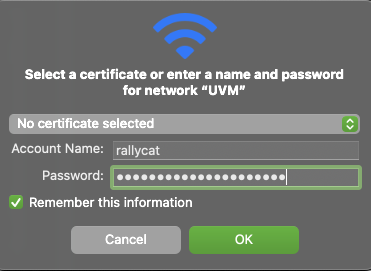
- Enter UVM NetID and password, then click OK
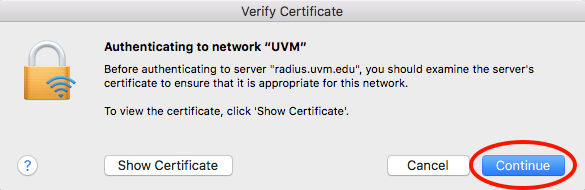
- If prompted to verify a certificate, click Continue

- You should now be connected to UVM WiFi
macOS 12 Monterey and Older
- Click on the WiFi icon in the top right corner and select the UVM network.
- If you haven’t connected to UVM WiFi on this device in the past, you’ll be asked to verify UVM’s WiFi certificate.
- If prompted to verify the UVM WiFi certificate, click “Continue”
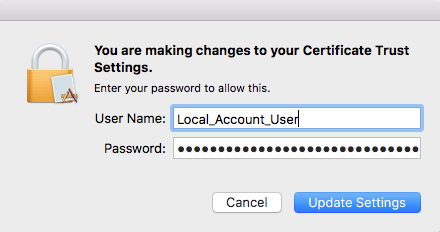
- Enter in the password you use to log into your computer — not your UVM NetID password.
- If prompted to verify the UVM WiFi certificate, click “Continue”
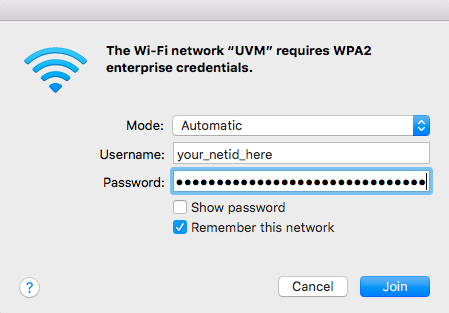
- Enter your UVM NetID and password, then click “Join“. (If you’ve forgotten your NetID password you can reset it here: https://uvm.edu/account)
- You should now see the filled wireless icon, indicating a successful connection to the wireless network.

Chromebook
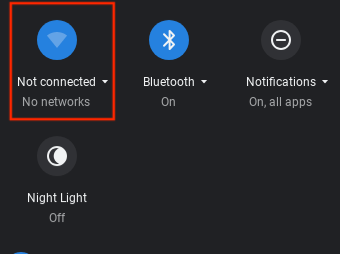
- Click the Wifi icon in the lower right corner of your screen.

- Select the Wi-Fi networks icon.
- From the list of available networks, select the UVM network.

- Enter the following settings to connect:
SSID: UVM
Security: EAP
EAP Method: PEAP
Phase 2 authentication: MSCHAPv2
Server CA certificate: Default
Identity: your_uvm_netid
Password: your_uvm_netid_password
Domain Suffix Match: uvm.edu
Anonymous identity: <leave blank>
Allow other users of this device to use this network: toggle ON
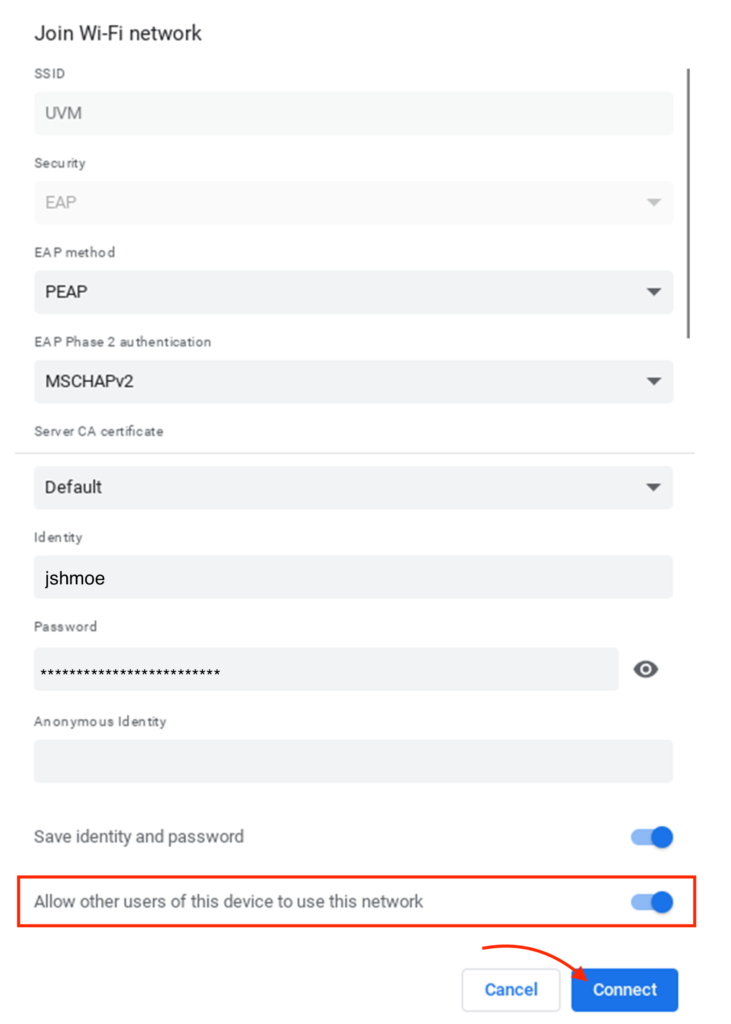
- When the settings have been entered, click the Connect button.

Linux
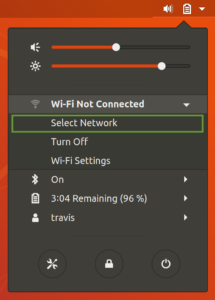
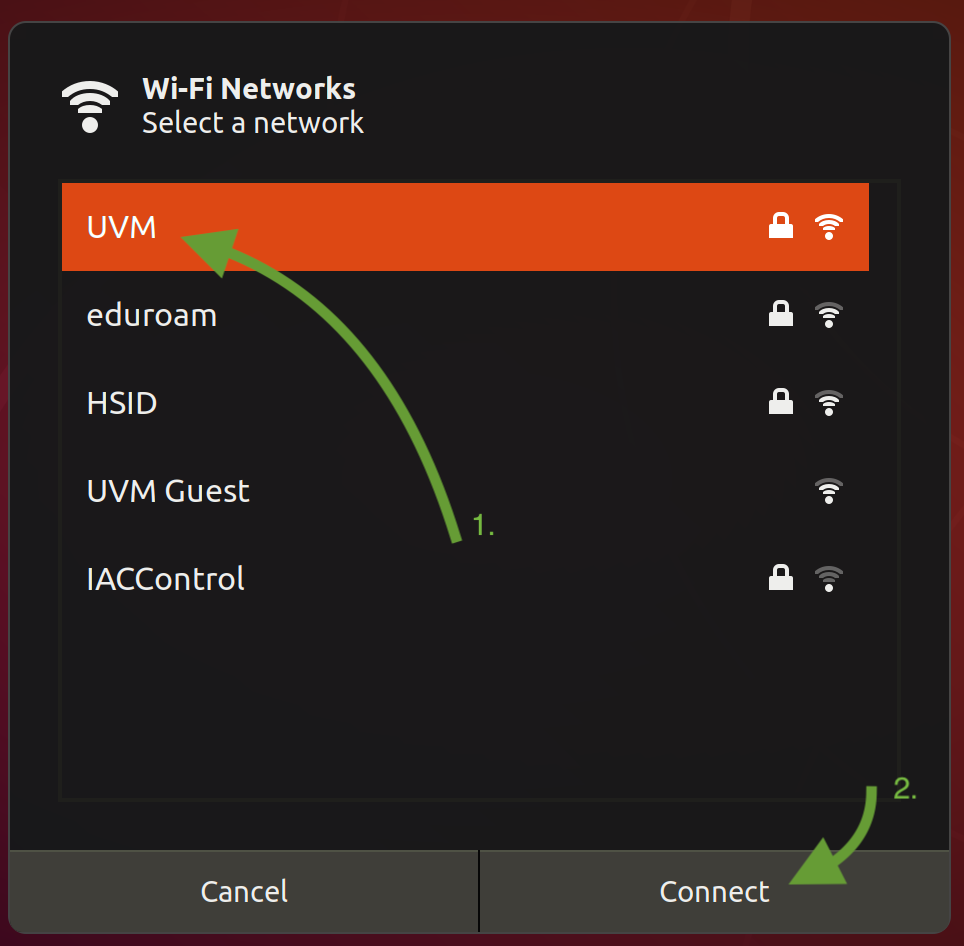
- Click the drop-down carrot in the top right corner. Under the Wi-Fi area, click on “Select Network”
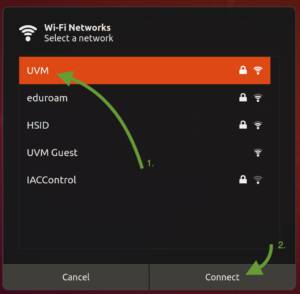
- Choose the UVM network, then click Connect
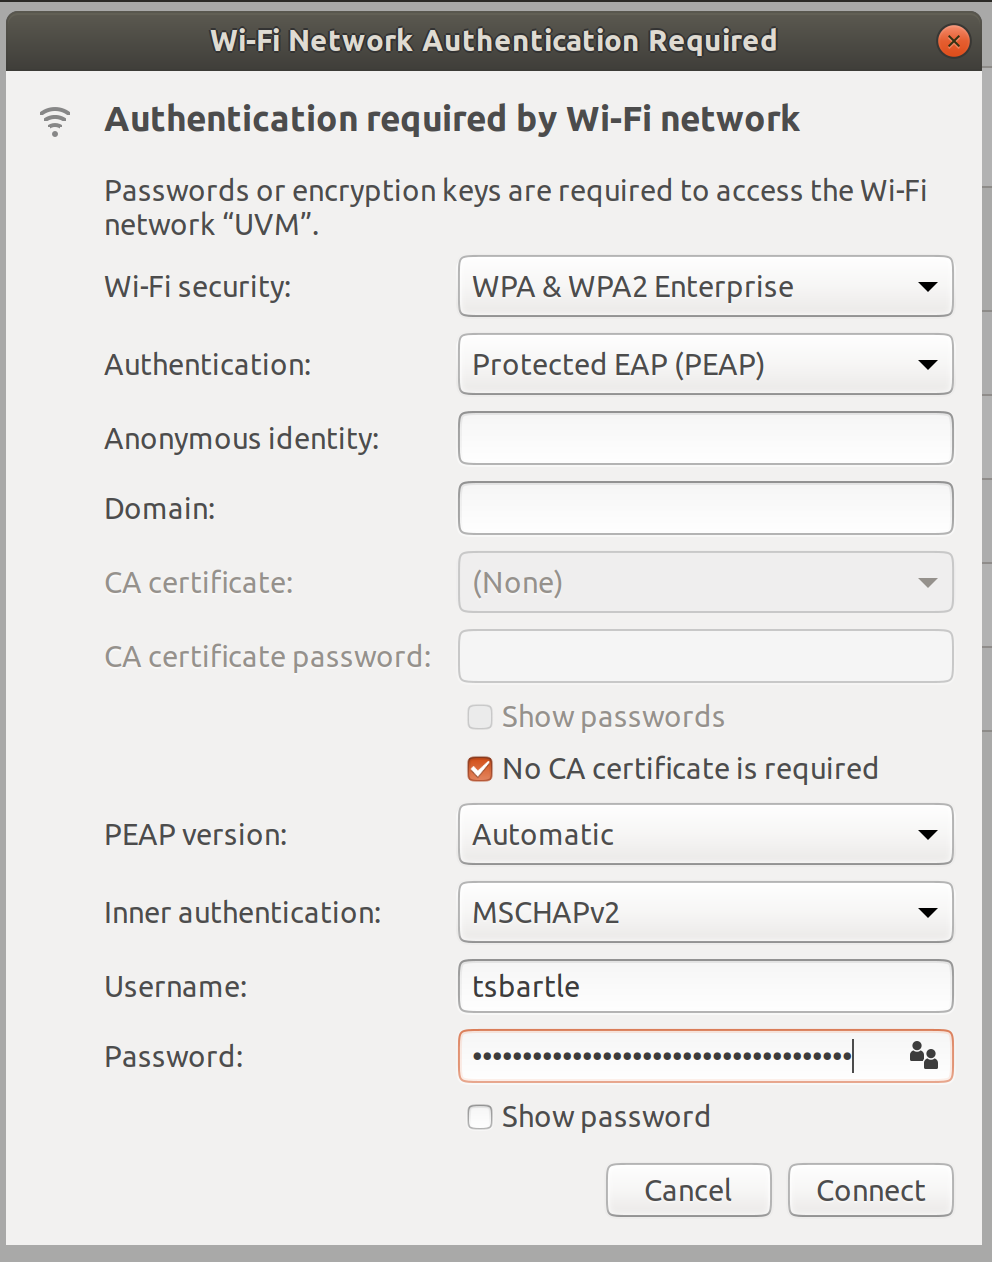
- The following settings are required to connect to the UVM wireless network:
Wi-Fi security: WPA & WPA2 Enterprise
Authentication: PEAP
Anonymous identity: <leave blank>
Domain: <leave blank>
CA certificate: None
CA certificate password: <leave blank>
No CA cert required: Checked
PEAP version: Automatic
Inner Authentication: MSCHAPv2
Username: your_uvm_netid
Password: your_uvm_netid_password
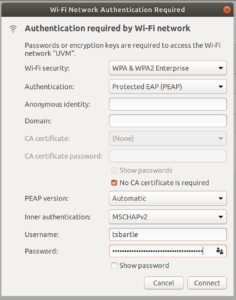
- When the settings have been entered, click the Connect button.

Raspberry Pi
This guide assumes you have some knowledge of Linux operating systems. You should also change the default password of your pi account!
- From a different device, download this certificate, you’ll need it later. We suggest putting the cert on a USB flash drive to easily move it to your Pi.
- On your pi, create a directory for the cert to live:
sudo mkdir /etc/certs
- Copy the cert to the /etc/certs directory:
sudo cp -v /path/to/USERTrust_RSA_CS_2038.cer /etc/certs/
- Use nano to edit the /etc/dhcpcd.conf file:
sudo nano /etc/dhcpcd.conf
- Add the following lines to the bottom of the /etc/dhcpcd.conf file:
interface wlan0
env ifwireless=1
env wpa_supplicant_driver=wext,nl80211
- Launch the Raspberry Pi configuration menu:
- From the Raspberry Pi’s terminal, type:
sudo raspi-config - This should launch a menu, select Localization Options….
- Select Change Time Zone and select US/Eastern
- Select Change Wi-Fi Country and set to US United States
- Select Finish
- From the Raspberry Pi’s terminal, type:
- Manually set the date and time with the command below. (Replace values with the current date and time).
sudo date -s "Mon Sep 16 10:54 2019"
- Create a HASH of your UVM NetID password by entering the following in the command line:
echo -n "your_uvm_netid_password" | iconv -t utf16le | openssl md4
- Copy the resulting string after
(stdin)=, you’ll use that in the Step 9.
- Copy the resulting string after
- Use nano to configure the wpa_supplicant.conf file:
sudo nano /etc/wpa_supplicant/wpa_supplicant.conf
- Below is what your wpa_supplicant.conf file should look like.
country=US ctrl_interface=DIR=/var/run/wpa_supplicant GROUP=netdev update_config=1 network={ ssid="UVM" scan_ssid=0 key_mgmt=WPA-EAP eap=PEAP identity="netid" password=hash:YOUR_PASSWORD_HASH ca_cert="/etc/certs/USERTrust_RSA_CA_2038.cer" phase2="auth=MSCHAPV2" } - Press Ctrl + X to save the file.
- Below is what your wpa_supplicant.conf file should look like.
- Reboot your pi
sudo reboot
Phones and Tablets
iOS - iPhone and iPad
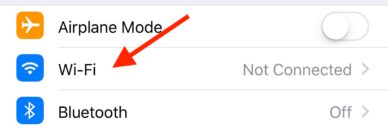
- Open the Settings app.
- Tap the Wi-Fi settings icon.
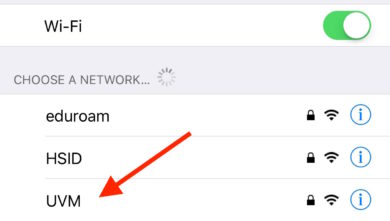
- Tap the UVM wireless network.
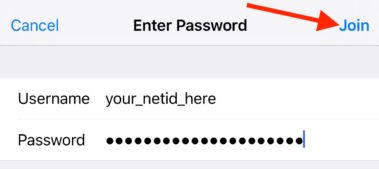
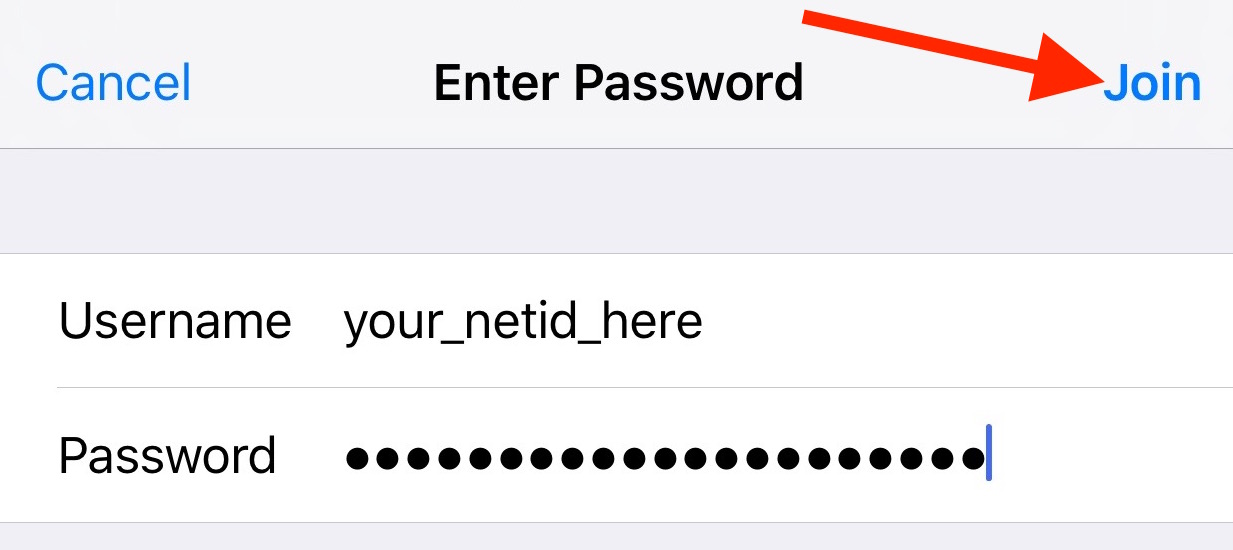
- Enter your UVM NetID and password, then tap Join in the top right corner. (If you’ve forgotten your NetID password you can reset it here: https://uvm.edu/account)
- Trust the radius.uvm.edu certificate. Note that the correct certificate is signed by InCommon RSA Server CA
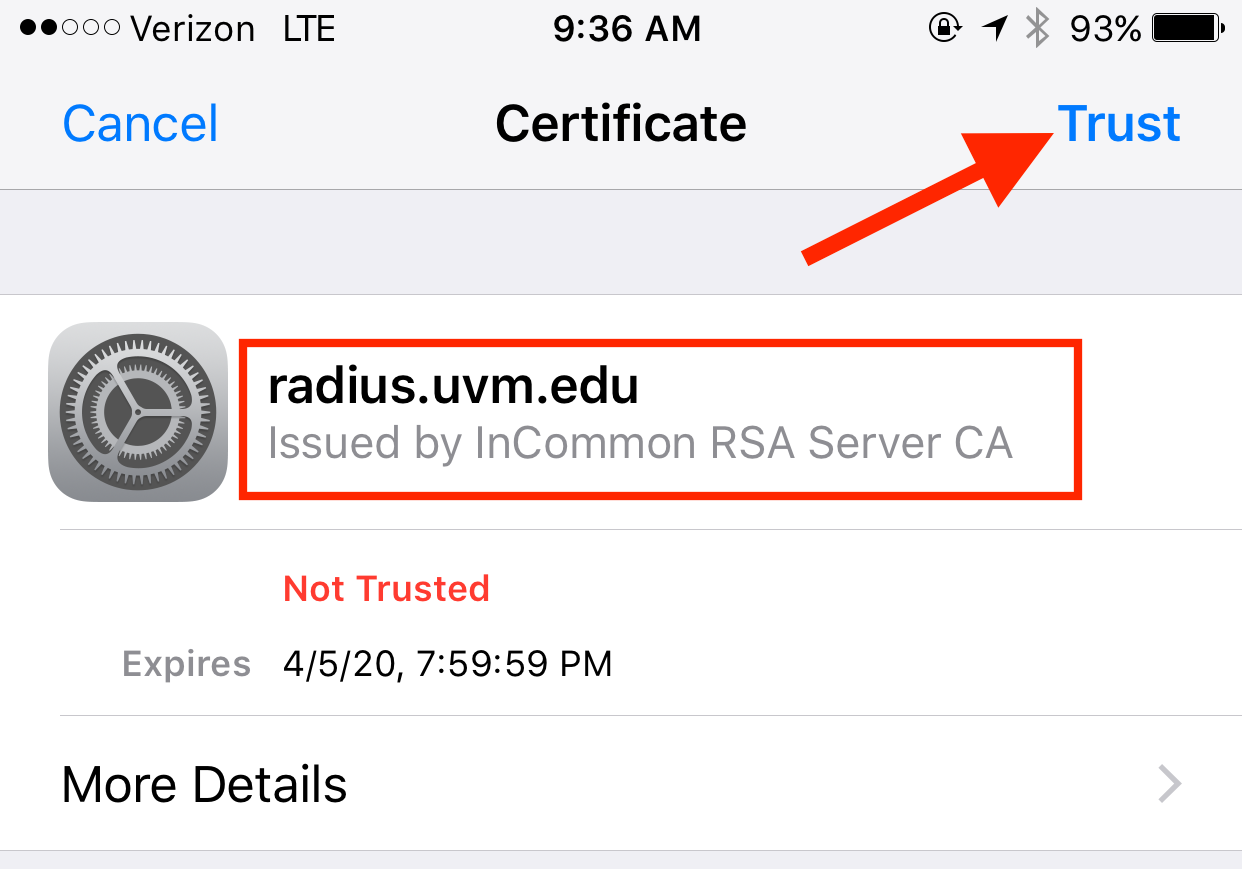


That’s it! You’ve successfully connected your iOS device to the UVM wireless network.
Android
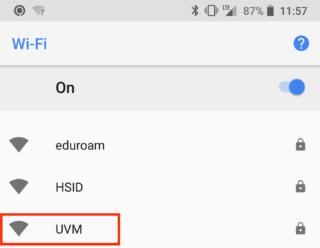
- Open the Wifi settings and select the UVM network.
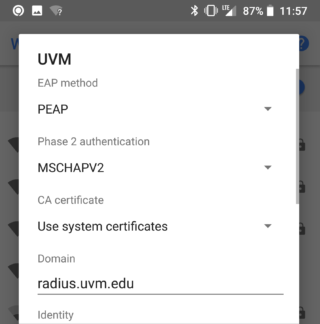
- Configure the connection settings as follows:
EAP Method: PEAP
Phase 2 authentication: MSCHAPV2
CA Certificates: Use system certificates
Domain: radius.uvm.edu
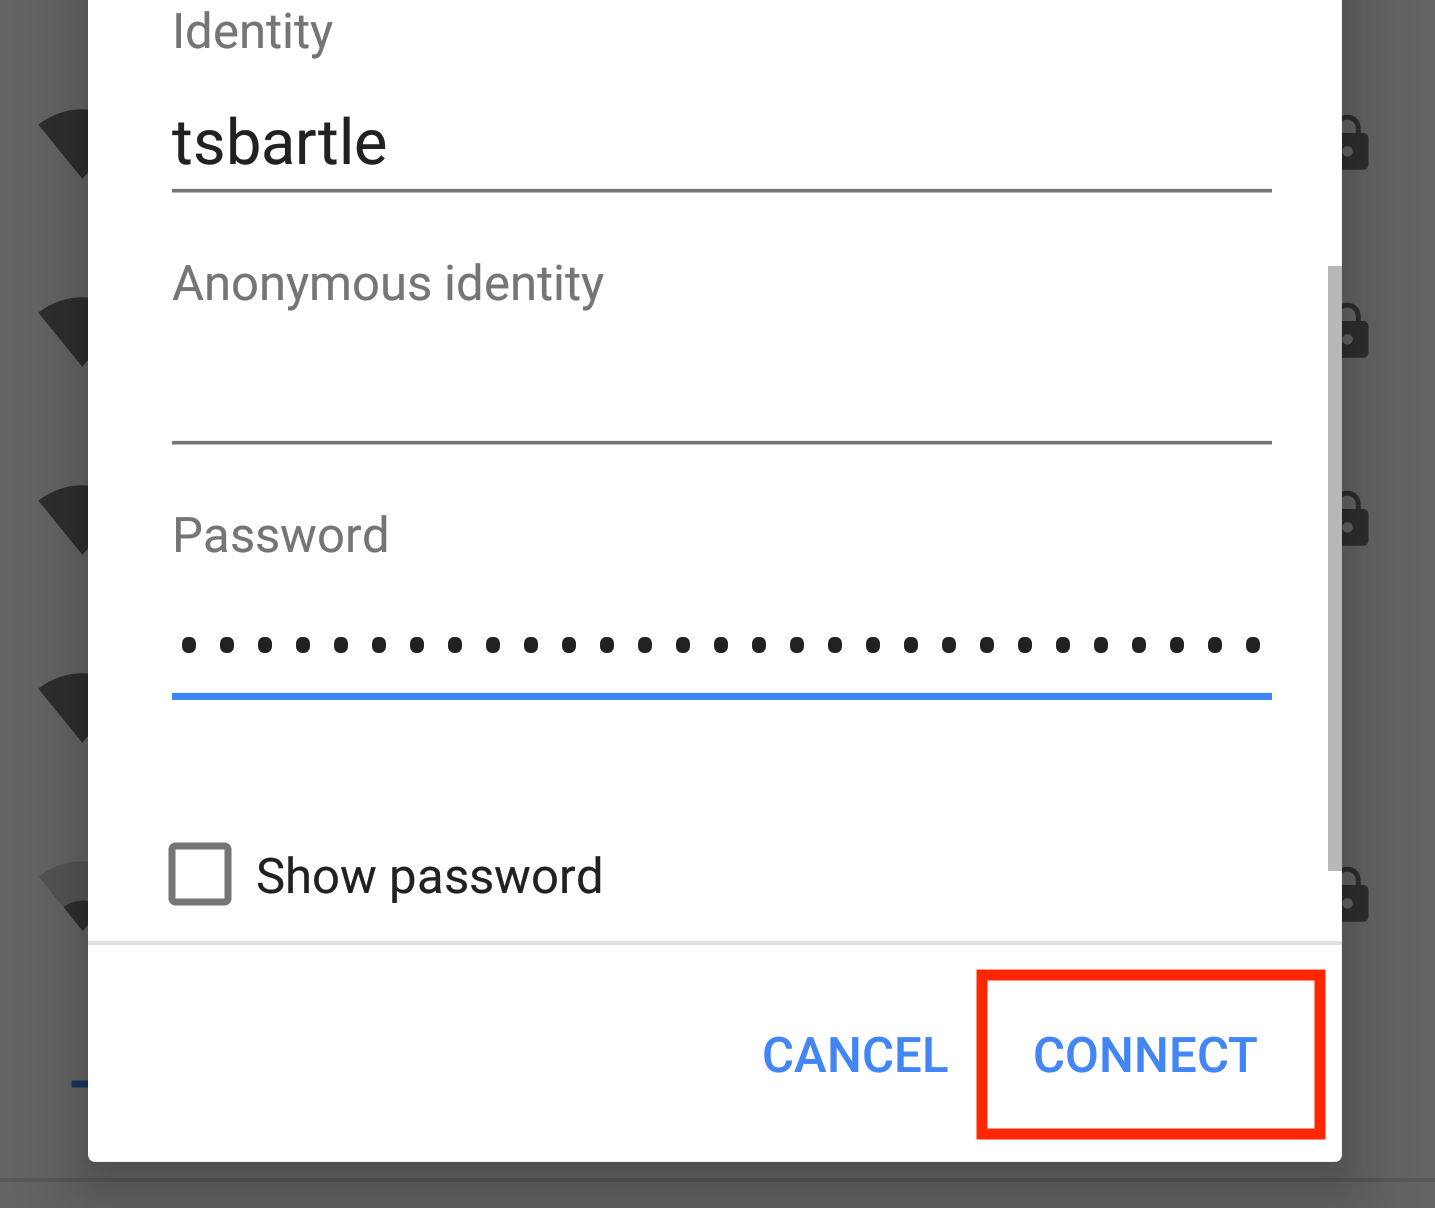
Identity: your_uvm_NetID
Anonymous Identity: <leave blank>
Password: your_NetID_password
- When the settings have been entered, tap on CONNECT.


That’s it, you’ve successfully joined the UVM Wireless network on your Android phone!
Android - manual certificate installation
Some Android device manufacturers do not provide pre-installed system certificates for remote system validation.
If your Android device does not give you the option to “Use system certificates” when specifying settings for connecting to UVM wireless, you can manually install the required certificate instead.
- Navigate to https://go.uvm.edu/wificert in your chose browser.
- Many phones will install the certificate automatically when the download completes. If your device does not do this, you can tap the downloaded AddTrustExternalCARoot.cer file to install it.
- If prompted, enter your phones passcode.
- Some phones require that you name the certificate and specify its use:
Certificate name: UVM wifi
Credential use: Wi-Fi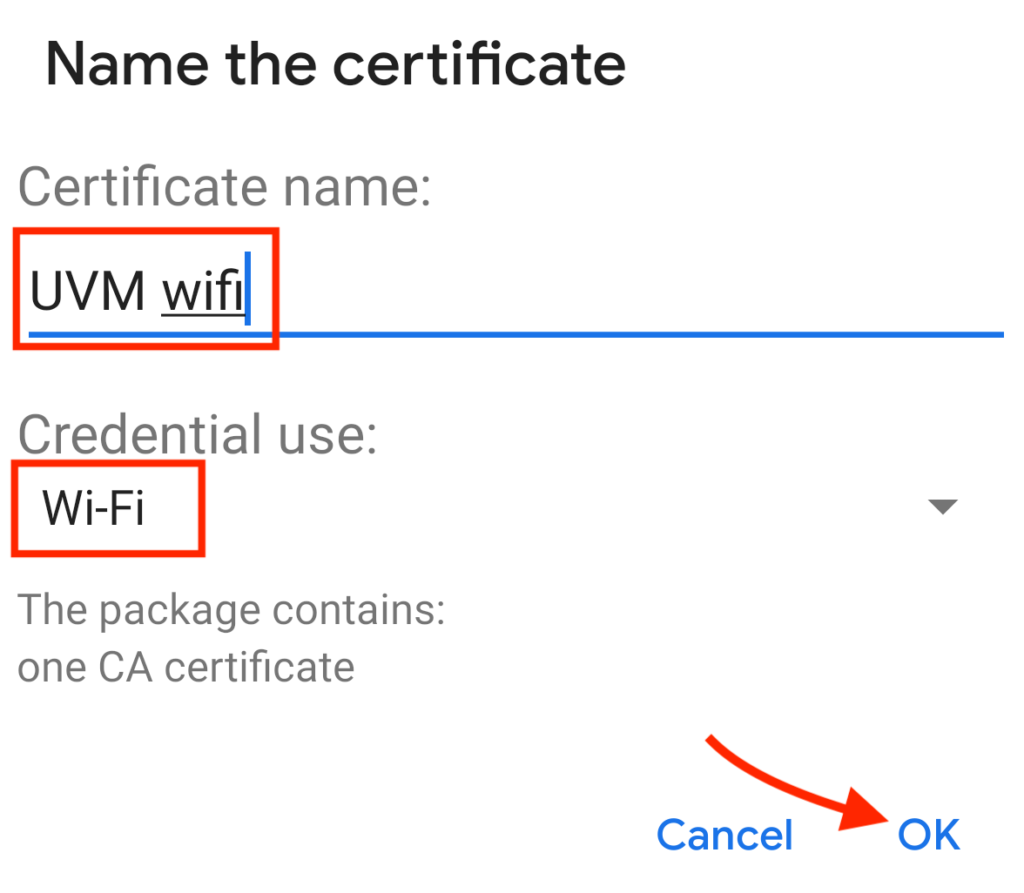
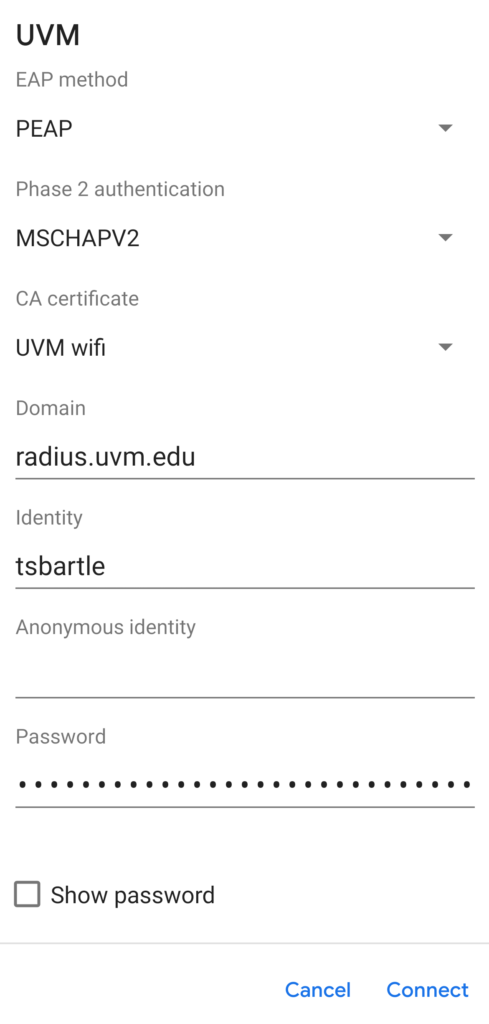
- After installing/naming the certificate, open your devices Wi-Fi settings and select the UVM network.
- Configure the connection settings as follows:
EAP Method: PEAP
Phase 2 authentication: MSCHAPV2
CA Certificates: UVM wifi
Domain: radius.uvm.edu
Identity: your_uvm_NetID
Anonymous Identity: <leave blank>
Password: your_NetID_password


Other
Game and Media Consoles
To register your game console or media streaming device to the WIRED UVM network:
- Fill out the Play Online Form: https://go.uvm.edu/playonline.
- Shut down your console or media streaming device.
- Turn your device back on. You should now have internet access.
- If you still do not have internet access, wait 5 minutes, then reboot your device again.
Wireless Printers
Wireless printers are not able to connect to the UVM Wireless Network – they aren’t designed for use with WPA2-Enterprise networks, a common WIFI network standard used by UVM and most other universities.
Additionally, it is not recommended to register a printer on our NetReg database for use with an Ethernet connection. Doing so represents a security risk; anyone connected to UVM’s network via Ethernet will be able to see your printer and print to it. This can lead to unwanted print jobs, excessive ink and paper use, and other issues.
Instead, you should use a printer cable to connect your printer to your computer. This direct connection will be required every time you want to print, but gives you the most control over your printer, and will work reliably. These cables can be picked up at the UVM Tech Store, though many printers will include them.
General Settings
- Wireless (WLAN) SSID: UVM
- Wireless Protocol: WPA2 Enterprise
- Authentication Method: 802.1x with PEAP/MS-CHAPv2
- PEAP as outer protocol
- MS-CHAPv2 as inner protocol
- SSL Certificate:
- Issued To/Common Name: radius.uvm.edu
- Issued By/Issuer: InCommon RSA Server CA
- Verify that the certificate presented has one of the following fingerprints:
- SHA-1: 74 B6 B6 37 49 6B 36 55 67 D9 2B 54 4E B0 AD AC AF 06 19 E9
- SHA-256: 0A 16 69 77 31 16 BC E5 F7 CE 95 BD C7 7F 69 EF 3D 00 60 4B EE 26 20 31 57 AC BC 3B ED 3E F1 E2
- Username: [Your UVM NetID]
- Password: [Your NetID Password]